You know those Instagram profiles where every photo flows perfectly into the next, creating one massive, seamless image across 9 posts? I always thought that required Photoshop, professional planning, and probably a degree in graphic design. Turns out, it takes about 30 seconds and exactly zero skills. Here's how I accidentally went viral.
It Started with a Sunset
Last weekend, I was going through my camera roll — the digital graveyard where all my "I'll post this later" photos go to die. Somewhere between 47 pictures of my lunch and a blurry screenshot of a meme I forgot to send, I found it.
A sunset photo from a road trip three months ago.
It was gorgeous. Golden hour perfection. The kind of sky that looks fake but isn't. The problem? It was a panorama — super wide, super cinematic, but absolutely terrible for Instagram's square format.
I tried cropping it. Lost the mountains on the left. Tried a different crop. Lost the reflection on the right. Every version felt like I was murdering the photo.
Then I remembered: people split photos into grids all the time. You know — that thing where you post 9 images in a row and they combine into one giant picture on your profile? I'd seen influencers do it. Travel bloggers. Even that one friend who takes Instagram way too seriously.
How hard could it be?
The Frustrating Search for a Tool
I started Googling. "Split image into 9 parts." "Instagram grid maker free." "3x3 photo cutter online."
What I found was... disappointing:
- Tool #1: Required signing up with my email. Hard pass.
- Tool #2: Added a watermark. On each of the 9 pieces. Absolutely not.
- Tool #3: Looked like it was built in 2008. The "Upload" button didn't even work.
- Tool #4: Free for the first cut, then $9.99/month. For splitting a photo. Are you kidding me?
I was about to give up and just post the cropped version when I stumbled onto something different.
Enter: ToolKnit's Image Grid Split
I found ToolKnit.com through some random Reddit thread. Someone recommended it for exactly what I needed: splitting any image into a perfect 3×3 grid.
No signup. No watermark. No weird limitations. Just... a tool that does the thing.
Here's what the interface looked like when I dropped my sunset panorama in:
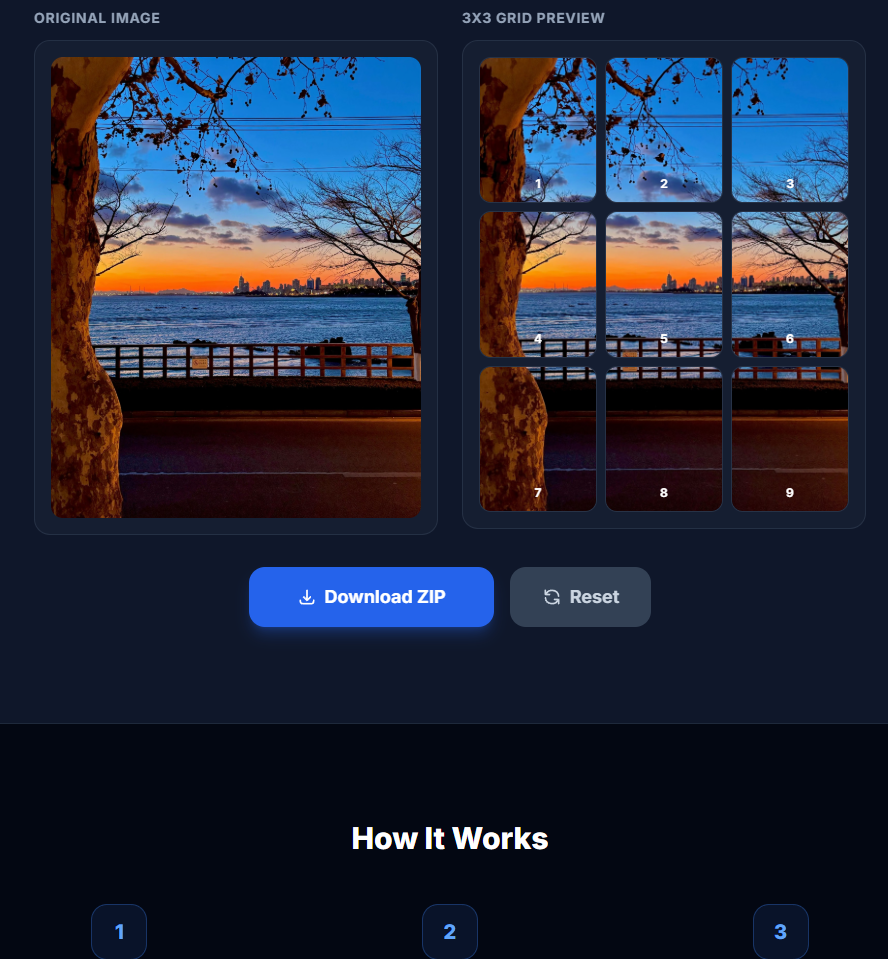
I uploaded my image, previewed how it would be sliced, and hit the download button. Five seconds later, I had a ZIP file with all 9 perfectly cut squares, numbered in the exact order I needed to post them.
No fiddling with guides. No manual cropping. No math. Just... done.
The Upload
I opened Instagram and started posting. Image 9 first (bottom right), then 8, 7, 6... all the way to 1 (top left). The app lets you post multiple at once, but for the grid effect, you need to do them as separate posts.
It took maybe 3 minutes. And when I refreshed my profile page...
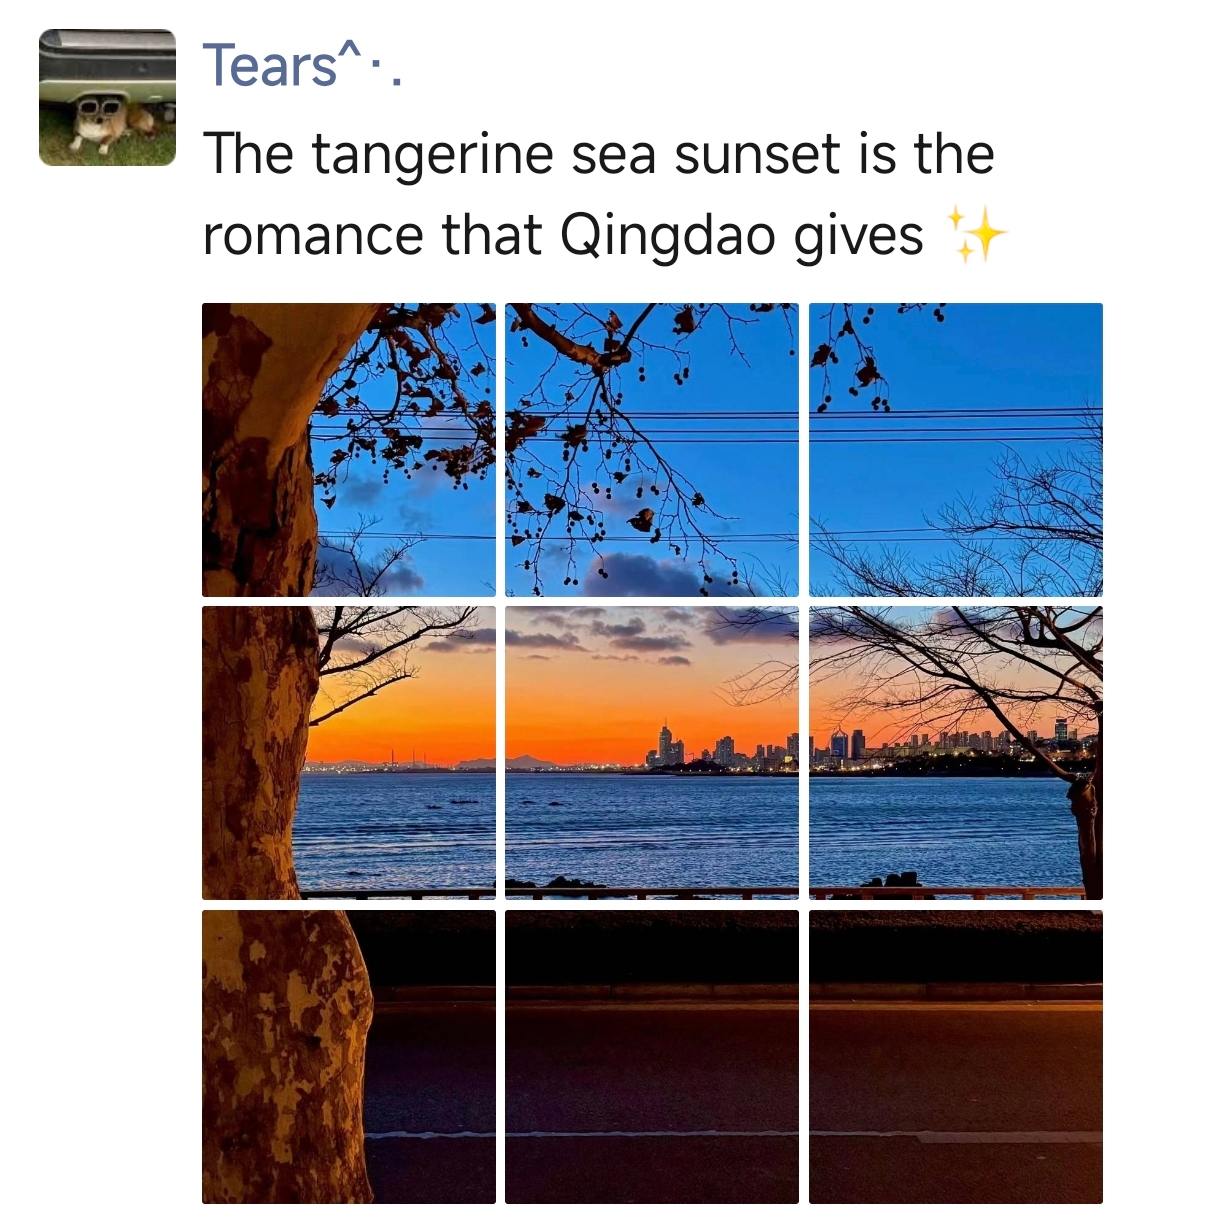
It looked incredible.
The sunset stretched across my entire profile. The colors lined up perfectly. It looked like I'd spent hours in Photoshop — but really, I'd spent less time on this than I spend deciding what to have for lunch.
Then My Phone Started Buzzing
Within an hour, the likes started rolling in. But more importantly — the DMs.
"Wait how did you do that??"
"Omg your profile looks so aesthetic"
"What app is this? I need it for my travel pics"
"Tutorial please!!!"
By the end of the day, that grid had more engagement than my last 20 posts combined. People were actually visiting my profile just to see the full image. The comments section turned into a mini tutorial thread.
All from one panorama and a free tool I found by accident.
Why This Actually Works
Here's the thing about Instagram (and social media in general): most content looks the same. Square photos. Filters. Maybe a carousel if you're feeling fancy.
But a grid post? That's different. It makes people stop scrolling. It makes them tap on your profile to see the full picture. It's visual storytelling that actually stands out.
And the best part? You don't need to be a designer. You don't need expensive software. You don't even need to plan ahead. Just find a great wide photo you already have, split it, and post.
Pro Tips If You Want to Try This
- Use landscape photos — panoramas, cityscapes, or any wide shot works best
- Post in reverse order — start with square 9 (bottom right), end with square 1 (top left)
- Don't post all 9 at once — space them out by a few minutes so they don't flood your followers' feeds
- Check the preview — ToolKnit shows you exactly how it'll be sliced before you download
Got a Photo That Deserves the Spotlight?
Split it into a 3×3 grid in seconds. No signup. No watermark. Free forever.
Try Image Grid Split — FreeThe Takeaway
We all have photos sitting in our camera rolls that deserve better than being forgotten. That epic landscape. That group shot from the concert. That random picture you took because the lighting was just *chef's kiss*.
A grid layout gives those photos a second life. It turns a single image into an experience. And it makes your profile look like you actually know what you're doing on social media (even if you're just winging it like the rest of us).
So next time you're scrolling through your photos thinking "this would look amazing if only..." — now you know. 30 seconds. 9 squares. Zero excuses.
More Free Tools You Might Like
ToolFind helps you discover the best free online tools for every need. Here are a few favorites: